I'm lucky that my project will use FAST ESP to be our search engine. In next a few months, I will write some articles to talk about the FAST ESP. Since I'm a beginner, there may be a lot of errors, mistakes in my article. So if you know something, please let me know. I'll be very appreciated your help. :)
FAST ESP which is a a product of FAST, a subsidiary of Microsoft, stands for "Enterprise Search Platform". In this article, I will talk about how to install it.
---------------------------------------------------------------------------------------
Prepare to install
There are three software need to be installed before installing FAST ESP manually. They are .NET Framework, Java SDK and Microsoft Visual C++ 2005 SP1 Redistributable.
1. Install .NET Framework
The .NET Framework can be installed from
here.
2. Install Java
You can download the latest Java from
Java.com. After the installation complete, you need to configure the Java Environment Variable. You can refer to my another
article to see how to do that.
But one thing you need to pay attention: ESP only supports Java x86 version whatever you are using a x86 OS or a x64 OS.
3. Install Microsoft Visual C++ 2005 SP1 Redistributable.
It also pretty easy to install the Microsoft Visual C++ 2005 SP1 Redistributable, as well as Java and .NET Framework. You can download it from
here and then install it.
Note: The link is x64 bit. If you are using a x86 bit system, you need to download a x86 one from here.
--------------------------------------------------------------------------
Start to install ESP
All right, we are ready to install the FAST ESP on our server. Let's get into our topic quickly. :)
1. Go to your installation directory, double click the
setup.exe file to kick off the installation.
2. In the
InstallShield Wizard, click the
Next button to go to the next step.
3. In the agreement page, select "
I accept...." option, and then click the
Next button.
4. In the third party software components page, select "Yes, complete the download and installation" option, and then click the Next button.
5. Then it gets started on downloading all third party software. It will take a few minutes.
6. After the downloading completed, it will ask you if you are going to install them. Select "
Proceed" and then click
Next button
7. In the next step, you need to get your license file, use the browser to find it out, and then click the
Next button.
8. I'm doing a demo in this article, so we can select
Single Node mode, and then click
Next button. More installation can be from in
ESP Installation Guide.
9. Enter your service
username and
password, and then click
Next button.
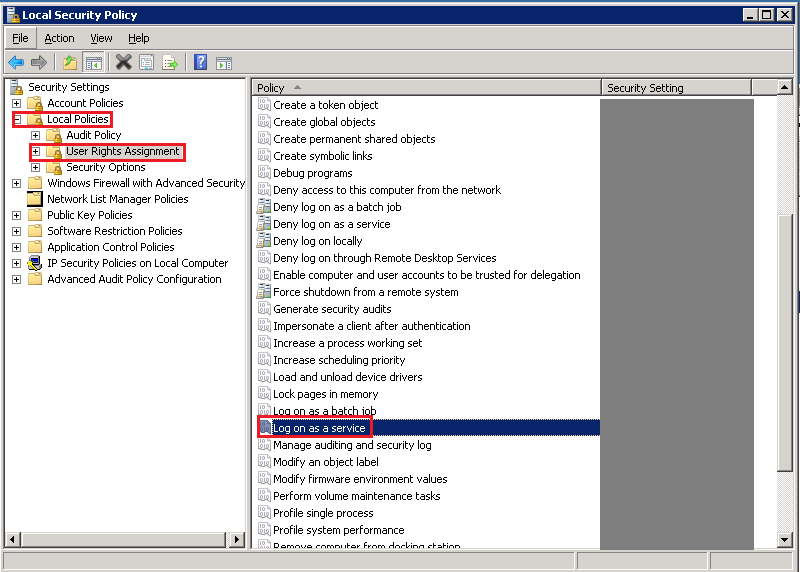
In this step, you need to make sure your service account has the "Log on as a service" right. Otherwise, you will receive the following error dialog.
a. To grant your account the right, click
Start ->
Administrative Tools ->
Local Security Policy
b. In the
Local Security Policy tool, expand
Local Policies, select
User Rights Assignment and then select
Log on as a service from the right side.
c. Double click the
Log on as a service item, add your account to the list, click
OK button to close the dialog and then click the Next button again in the FAST ESP installation page.
10. Select a installation path, and then click
Next button.
Note: the path can't contain a white space.
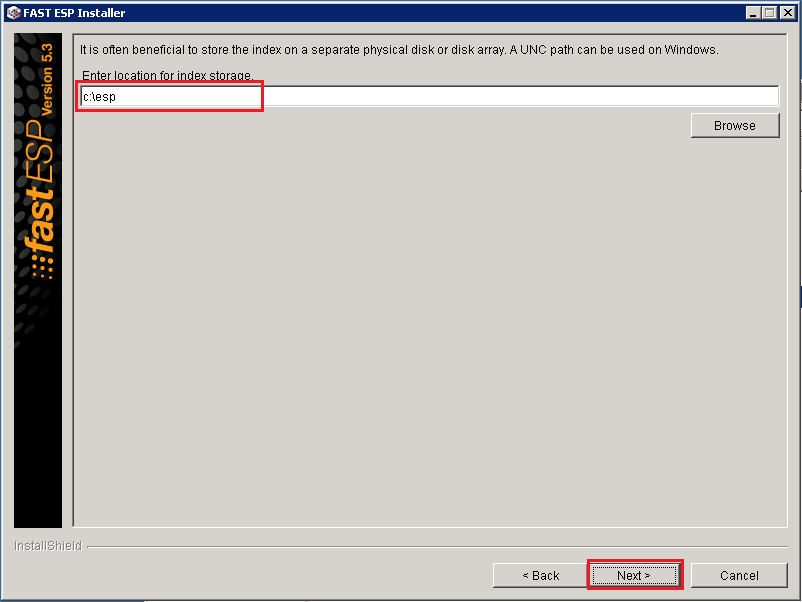
11. Select a index storage path, and then click
Next button.
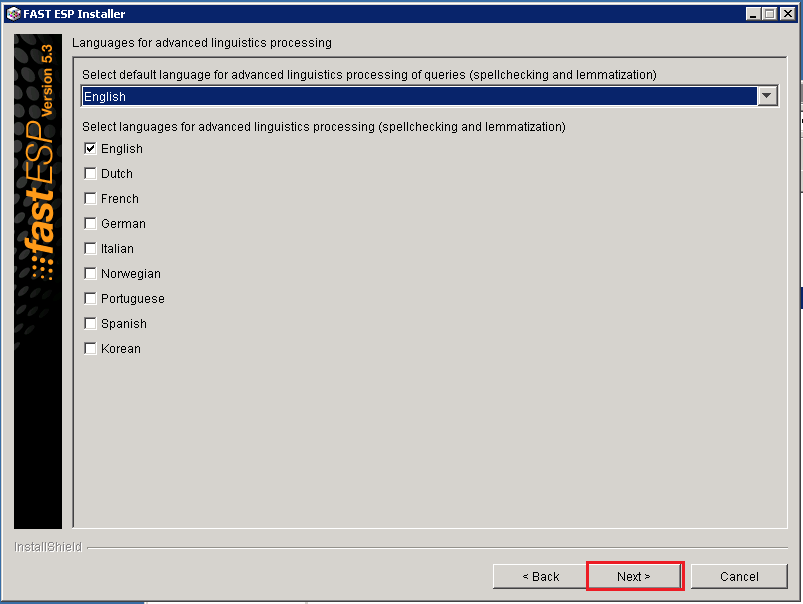
12. In the language setting page, keep all default and click the
Next button.
13. Keep the default port and click the
Next button.
14. Keep selecting
Standard web profile, and click Next button. For the index profile, we can change it from the admin UI.
15. Type your
organization name,
administrator email address and then click the
Next button.
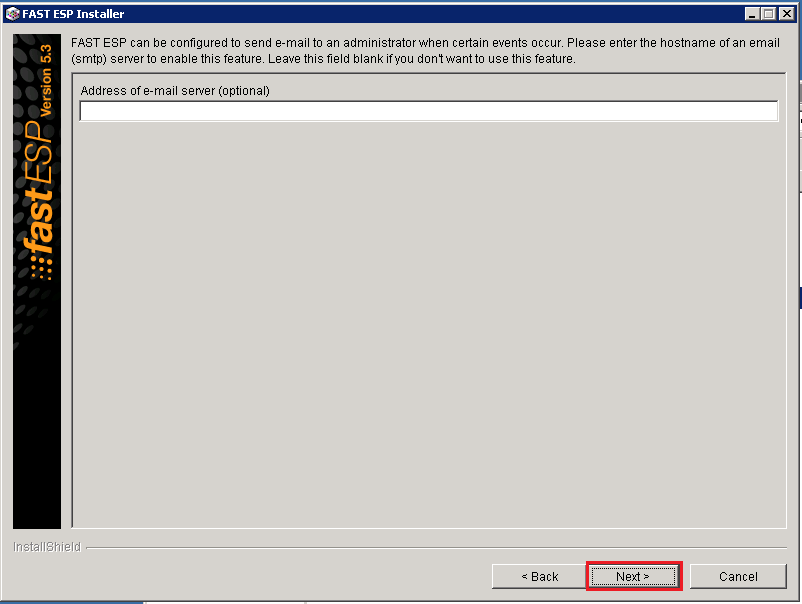
16. If you want to send an email to your administrator mail box when certain events occurs, you can configure a SMTP server. For me, I just keep it empty. Click the
Next button.
21. In the review page, you can verify your settings and then click
Next button
22. Right now, it starts to testing your environment. If everything is fine, it will start to install ESP to your server.
23. After the ESP installation competed, you can start the service. Click
Next button
24. Click the
Finish button to close the dialog.
25. You can use the URL provided in step 24 to visit the admin UI.
--------------------------------------------------------------------------------
Installation Troubleshooting
1. Microsoft Visual C++ 2005 Redistributable can't be found
I was not lucky that I run into this issue. From the installation guide, it said I can install x64 sp1 one and it will work. But in my server, I wouldn't success until I install a x86 without SP1. It can be download from
here.
2. ESP doesn't support daylight saving times.
From the installation guide, it mentioned that ESP doesn't support daylight saving times. That means you need to turn it off.
a. Click your
date & time from the task bar, and click
Change date and time settings.
b. Click the
Change time zone button
c. Unselect the
Automatically adjust clock for Daylight Saving Time check box, and then click the
OK button
--------------------------------------------------------------------
Install Service Patch
1. To install a service patch, you need to stop the service first. Click
Start ->
All Programs ->
FAST ESP ->
FAST ESP - Stop
2. Go to your service patch folder, double
install.cmd file.
Note: there are a lot of *.exe files, do not use them. Otherwise, your server won't be connected anymore.
3. Select
Install Patch, and then click
Next button
4. Select your ESP installation path, and click
Next button.
5. Since we are in the demo server, keep selecting
Single node installation and then click the
Next button
6. Then it will check if your esp service is running, after that, you need to specify your patch file location. And then click
Next button.
7. Now, it's installing
8. If you are unlucky to run into the following issue, you need to kill these two processes manually and then reinstall this service patch.
9. After the service patch completed, you will see the result dialog. Click the Next button to close the dialog.
10. Click
Start ->
All Programs ->
FAST ESP ->
FAST ESP - Start to start the service
11. Open your browser, enter the admin URL: http://localhost:16000 to go to the admin page.
12. If you run into the following issue after you installed service patch, you need to another three steps
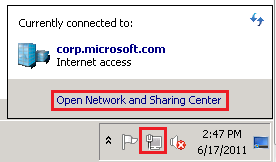
a. Disable your IPv6
Click your network icon from task bar, and then click
Open Network and Sharing Center
Click the
Change adapter settings from the left pane.
Right click your adapter, and then click
Properties
Uncheck the Internet Protocol Version 6 (TCP/IPv6) item, and then click the OK button.
b. Edit your registry
Click
Start ->
Run ... to open your registry editor.
Enter
regedit and then press
Enter button
Go to HKEY_LOCAL_MACHINE\SYSTEM\CurrentControlSet\services\TCPIP6\Parameters, create a DWORD named "DisabledComponents", and set it to "ffffffff"
c. Edit your host file
Go to your %windir%\System32\drivers\etc, open your hosts file using notepad, enter:
127.0.0.1
full computer name with domain name
After these three steps, refresh your collection page.


Hello Marshall this is a great blog. Thank you very much for taking the time to do this. Ed
ReplyDeleteGood one very useful. Tq Marshall
ReplyDelete