The Content Search Service Application allows you to crawl the data source in SharePoint and the Query Search Service Application allows you to query the crawling result in SharePoint. This article will show you how to setup them and then do a small test.
Before starting setup those service applications, you need to go to your FAST Search for SharePoint installation directory. Open the Install_Info.txt file. Because we need to get some information from it during the configuration.

-------------------------------------------------------------------------
Setup a Content Search Service Application
1. Open your SharePoint 2010 Central Administration, click -> Application Management -> Manage service applications

2. In the ribbon, click the New -> Search Service Application, you will get the Create New Search Service Application dialog

3. Enter a new search service application name, and then select FAST Search Connector. For the application pool, I suggest you create a new application pool for this service application. For the Content Distributors and Content Collection Name, you can get them from the Install_Info.txt file.

4. Click OK button and it will create the service application. After a few minutes, you will receive a success dialog.


5. click OK button to close the dialog.
6. Enable Configure SSL enabled communication
a. Copy the script securefastsearchconnector.ps1 from the FAST Search Server 2010 for SharePoint administration server to the SharePoint Server 2010 server. The securefastsearchconnector.ps1 script is in the <FASTSearchFolder>, under installer\scripts\
b. Copy the certificate file FASTSearchCert.pfx from the FAST Search Server 2010 for SharePoint administration server to the SharePoint Server 2010 server. The certificate file is in the <FASTSearchFolder>, under data\data_security\cert\

c. Open a Microsoft SharePoint 2010 Management Shell with the Run as administrator option on the SharePoint Server 2010 server

d. Navigate to the directory where you copied the securefastsearchconnector.ps1 script and run it, replacing the necessary parameters with the values for your environment. The domain and user name should reflect the details of the user running the SharePoint Server Search 14 (OSearch14) service. .\SecureFASTSearchConnector.ps1 –certPath "path of the certificate\certificatename.pfx" –ssaName "name of your content SSA" –username “domain\username”

e. When prompted to enter the certificate password, enter the certificate password that you supplied when you ran the post-setup configuration of FAST Search Server 2010 for SharePoint.

-------------------------------------------------------------------------------
Setup a Query Search Service Application
1. Open your SharePoint 2010 Central Administration, click -> Application Management -> Manage service applications
2. In the ribbon, click the New -> Search Service Application, you will get the Create New Search Service Application dialog
3. Enter a Service Application name and then select FAST Search Query. There are two application pool settings. One is for Search Admin, the other is for Search query and site settings. You can select an existing one for them but I suggest you to create a new one for each of them.

4. Click OK button to finish the creation. After a few minutes, you will receive a success dialog.


5. Click OK button to close the dialog.
6. Go back to your SharePoint Central Administration, click Application Management -> click Configure service application associations

7. Click the default link under Application Proxy Group

8. Check your FAST Search Query application you created just now, click the [set as default] button and then click the OK button below.

------------------------------------------------------------
Enable queries from SharePoint
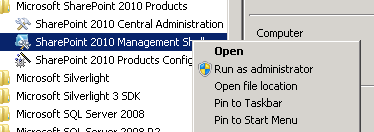
1. Go to your SharePoint 2010 server, click Start -> All Programs -> Microsoft SharePoint 2010 Products -> right click SharePoint 2010 Management Shell, and select Run as administrator
2. Type the following commands in the opened Windows Power Shell Dialog. After that, you will get your certification file.
· $stsCert = (Get-SPSecurityTokenServiceConfig).LocalLoginProvider.SigningCertificate
· $stsCert.Export("cert") | Set-Content -encoding byte MOSS_STS.cer

3. Copy this file to your FAST Search for SharePoint server
4. Go to your FAST Search for SharePoint server, click Start -> All Programs -> Microsoft FAST Search Server 2010 for SharePoint -> right click Microsoft FAST Search Server 2010 for SharePoint 2010 Shell, and select Run as administrator

5. At the Windows PowerShell command prompt, browse to <FASTSearchFolder>\installer\scripts\, where <FASTSearchFolder> is the path of the folder where you have installed FAST Search Server 2010 for SharePoint, for example C:\FASTSearch. Type the following command:
· .\InstallSTSCertificateForClaims.ps1 -certPath <"full path of MOSS STS certificate">

--------------------------------------------------------------------
Setup a FAST Search Center site
1. Go to one of your SharePoint site collection. Click Site Action -> Site Settings

2. Click Site collection features

3. Active the SharePoint Server Publishing Infrastructure feature
4. Go back to the Site Settings, click the Manage site features

5. Active the SharePoint Server Publishing feature
6. Click Site Action -> More Options

7. Find out the FAST Search Center template, enter the name and URL. Click Create button.

8. Now, your FAST Search Center web site is ready to go.

--------------------------------------------------------------------
Setup a Content Source for crawling
1. Open your SharePoint Central Administration, click Manage service applications -> <your FAST Search for SharePoint Content Application>

2. Click the Content Source from the left pane.

3. Click the New Content Source

4. Type the Name, keep selecting SharePoint Sites, enter the SharePoint site you want to crawl, check the Start full crawl of this content source and then click OK button

5. After the crawling complete, go to your FAST Search Center web site, enter some words and then press Enter button. You will get the search result


No comments:
Post a Comment